Shooting Basics
This section highlights the main components of rifle biathlon shooting. That includes the following items:
1. Review the safety protocol on page 1. This is always the first thing that new students should learn and it’s important to go over these rules with shooters before every shooting session and reinforce them as needed.
2. Right hand vs Left hand – most students will express a strong preference for shooting right or left handed. A few won’t be sure. In that case, you can help them choose which side to shoot on by checking their EYE DOMINANCE. Every athlete has one eye that is dominant and that will dictate which side they should shoot on. Eye dominance is almost always more important than handedness. To check for eye dominance, use WikiHow’s quick 5-step guide:
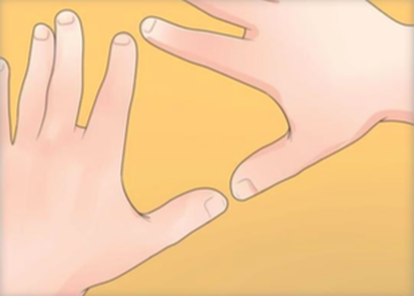
Hold your hands at arm's length out in front of you. Your palms should be pointing forward - in other words, you should be looking at the backs of your hands.
Make a "triangle." Extend both of your thumbs so that they're roughly perpendicular to the rest of the hand. Overlap your hands so that the space between makes a triangle. Your two thumbs should be at the bottom of the triangle, while the edge and index finger of each hand form the two remaining sides.
The space between your hands acts as a viewing window - you should be able to clearly see objects through it.
This section highlights the main components of rifle biathlon shooting. That includes the following items:
- Safety
- Eye/Hand dominance
- Positioning
- Sight picture
- Breath control
- Trigger squeeze
- Follow through
- Zeroing a Rifle
1. Review the safety protocol on page 1. This is always the first thing that new students should learn and it’s important to go over these rules with shooters before every shooting session and reinforce them as needed.
2. Right hand vs Left hand – most students will express a strong preference for shooting right or left handed. A few won’t be sure. In that case, you can help them choose which side to shoot on by checking their EYE DOMINANCE. Every athlete has one eye that is dominant and that will dictate which side they should shoot on. Eye dominance is almost always more important than handedness. To check for eye dominance, use WikiHow’s quick 5-step guide:
Hold your hands at arm's length out in front of you. Your palms should be pointing forward - in other words, you should be looking at the backs of your hands.
Make a "triangle." Extend both of your thumbs so that they're roughly perpendicular to the rest of the hand. Overlap your hands so that the space between makes a triangle. Your two thumbs should be at the bottom of the triangle, while the edge and index finger of each hand form the two remaining sides.
The space between your hands acts as a viewing window - you should be able to clearly see objects through it.
Look at an object through the triangle hole made by your hands with both eyes open. Find a nearby object that's small enough (or far enough away) that you can see the whole object through the viewing window between your hands. This can be anything - a door knob, a basketball hoop or another object that’s a ways away.
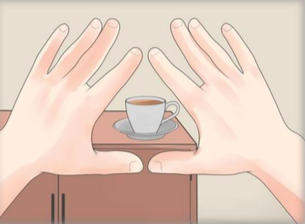
Focus on the object. Try to focus your eyes on the object between your hands - not your hands themselves. Your hands should become somewhat blurry, while the object remains clear and in-focus. It's important to line this object up directly in front of you and to stare straight at it - turning your head to either side can distort your results.
For best results, at this point, make minor adjustments to your hands so that the object you're looking at fits almost exactly within the edges your viewing window. In other words, if your triangle is bigger than the object you're looking at, move your hands together to make it smaller, and vice versa.
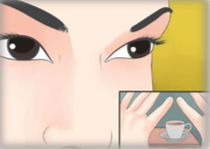
Alternate closing each eye to see which gives better vision. Close one eye, then open it and close the other. Each time you switch eyes, the object you're looking at should do one of two things. It should either become obscured behind one of your hands or remain visible. Next, try your other eye. Your dominant eye is the one that allows you to see the
object while it remains open.
In other words, if you close your left eye and the object jumps out of your vision, but you close your right eye and the object stays stationary, your left eye is your dominant eye.
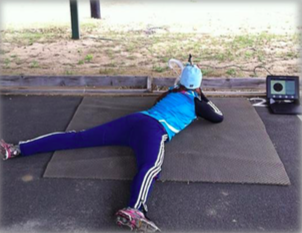
3. Basic Body Positioning
-When you get into prone (lying down) shooting position, you will be on your stomach, with your body angled a little to the left of the line to the target, as shown in the picture below. (This assumes you are right-handed.) Your spine should be straight and shoulders square with your spine. Your legs should be comfortably spread in a "V."
object while it remains open.
In other words, if you close your left eye and the object jumps out of your vision, but you close your right eye and the object stays stationary, your left eye is your dominant eye.
3. Basic Body Positioning
-When you get into prone (lying down) shooting position, you will be on your stomach, with your body angled a little to the left of the line to the target, as shown in the picture below. (This assumes you are right-handed.) Your spine should be straight and shoulders square with your spine. Your legs should be comfortably spread in a "V."
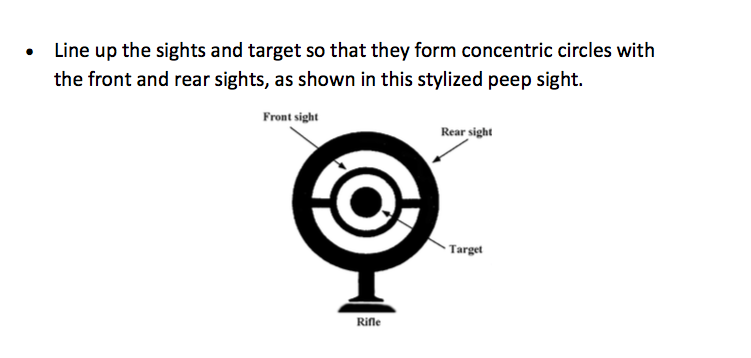
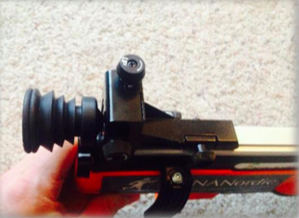
4. Sight Picture - Biathlon rifles use a "peep" sight. For right handed shooters, place your right cheek firmly on the cheek piece with your ‘dominant’ eye positioned directly behind the rear sight and roughly an inch or two back from the eyecup as shown.

5. Breath Control
Take deep relaxed breaths while you’re getting set up; don’t hold your breath or hyperventilate. When you are ready to shoot, exhale to the natural ‘bottom’ of your breath, pause on the target, and squeeze the trigger.
6. Trigger Squeeze
When you fire, gently squeeze the trigger. Do not jerk.
7. Follow Through
Once you squeeze the trigger, keep the barrel pointed at the target for a short interval. This helps you hit the target consistently.
Zeroing an Infrared Laser Rifle
It’s important that rifles are zeroed before each session and/or when the distance between target and rifle are changed. The zeroing process confirms that the gun sights are properly aligned with the barrel so that shots hit where the shooter intends them to. Follow the steps below to quickly zero the rifles.
1. Have an experienced shooter take 5 consistent shots off a prone rest.
2. Look at the location of the ‘group’ on the computer monitor. If it is in the center of the target, take 5 more shots to confirm.
3. If the first group is not centered, you will adjust the target using the windage (Left/Right) and elevation (Up/Down) dials located on the rear sight.
4. First decide which direction your group needs to move in order to be centered. In the group below, you need to move DOWN and RIGHT.
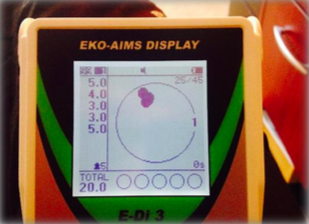
5. Make an adjustment. In this case the rough adjustment would be 10 clicks DOWN and 5 RIGHT. Shoot again.
6. Repeat this process until the group is relatively centered and then you can begin games or competitions.
Adjusting Target Size
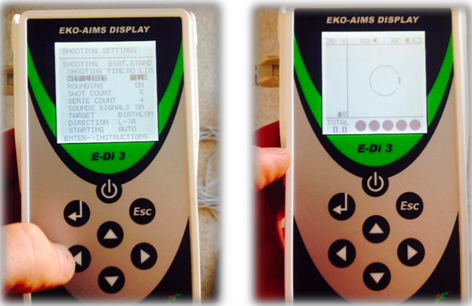
The computer automatically detects and adjusts for how far away the target is from the rifle, keeping the relative size of the target constant. However, it is possible to adjust the target size larger or smaller to force shooters to be more accurate or to set an easier mark for newer shooters. Target size is in a range between 1(largest) and 10 (smallest). In the image below the target is set to 5. To adjust target size:
1. Push the ‘back’ arrow to expose the menu and then hit the ‘back’ arrow again to expose
the ‘Shooting Settings.’
6. Repeat this process until the group is relatively centered and then you can begin games or competitions.
Adjusting Target Size
The computer automatically detects and adjusts for how far away the target is from the rifle, keeping the relative size of the target constant. However, it is possible to adjust the target size larger or smaller to force shooters to be more accurate or to set an easier mark for newer shooters. Target size is in a range between 1(largest) and 10 (smallest). In the image below the target is set to 5. To adjust target size:
1. Push the ‘back’ arrow to expose the menu and then hit the ‘back’ arrow again to expose
the ‘Shooting Settings.’
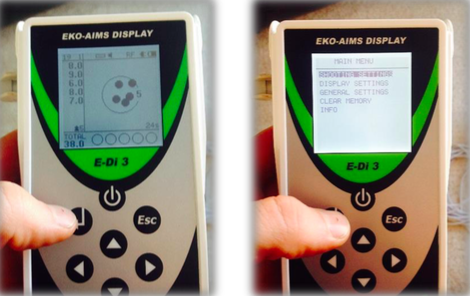
2. Scroll down to ‘Hit Limit’ and then use the left and right arrows to adjust target size. When you have scrolled to the correct size, hit the ‘ESC’ butto twice to return to the main shooting menue.